|
|
Article ID: 228
Last updated: 18 Oct, 2023
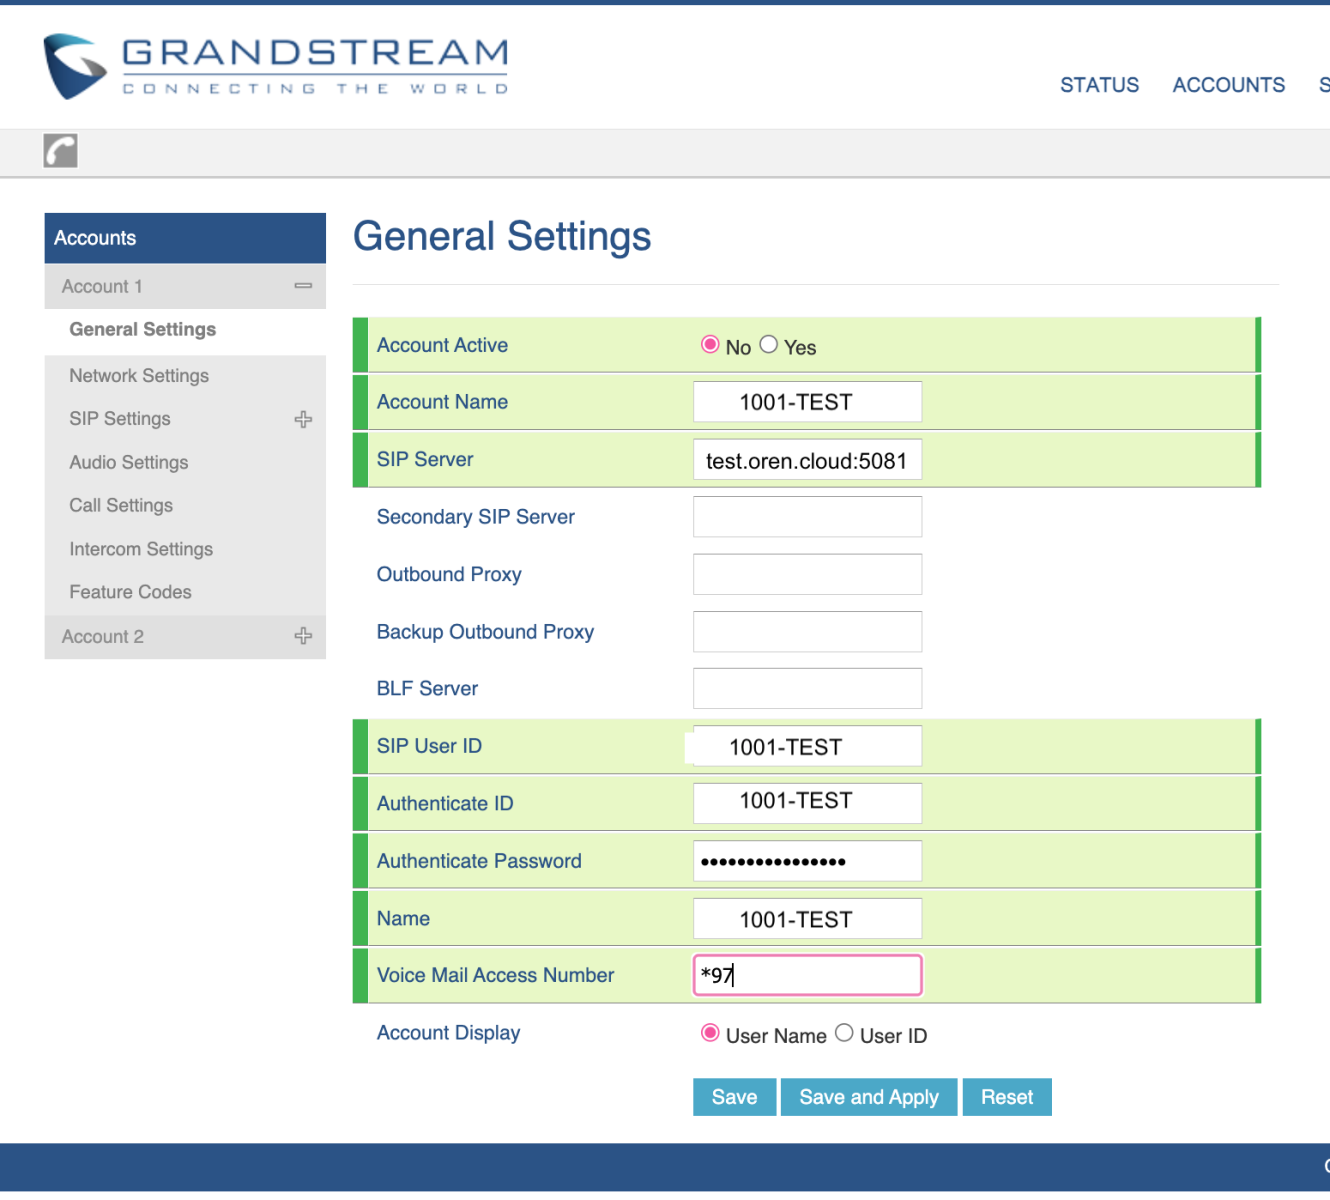
This document describes how to configure an Grandstream IP-Phone to connect to BTEL2.0 (to work aside OUC as well) In this document we will use a Grandstream GXP1628 T31P and extension 1001-TEST from customer TEST TIP: If the phone is not new it's recommended to do a factory reset. Settings not mentioned in this article as default OK. At Accounts -> Account1 -> General Settings
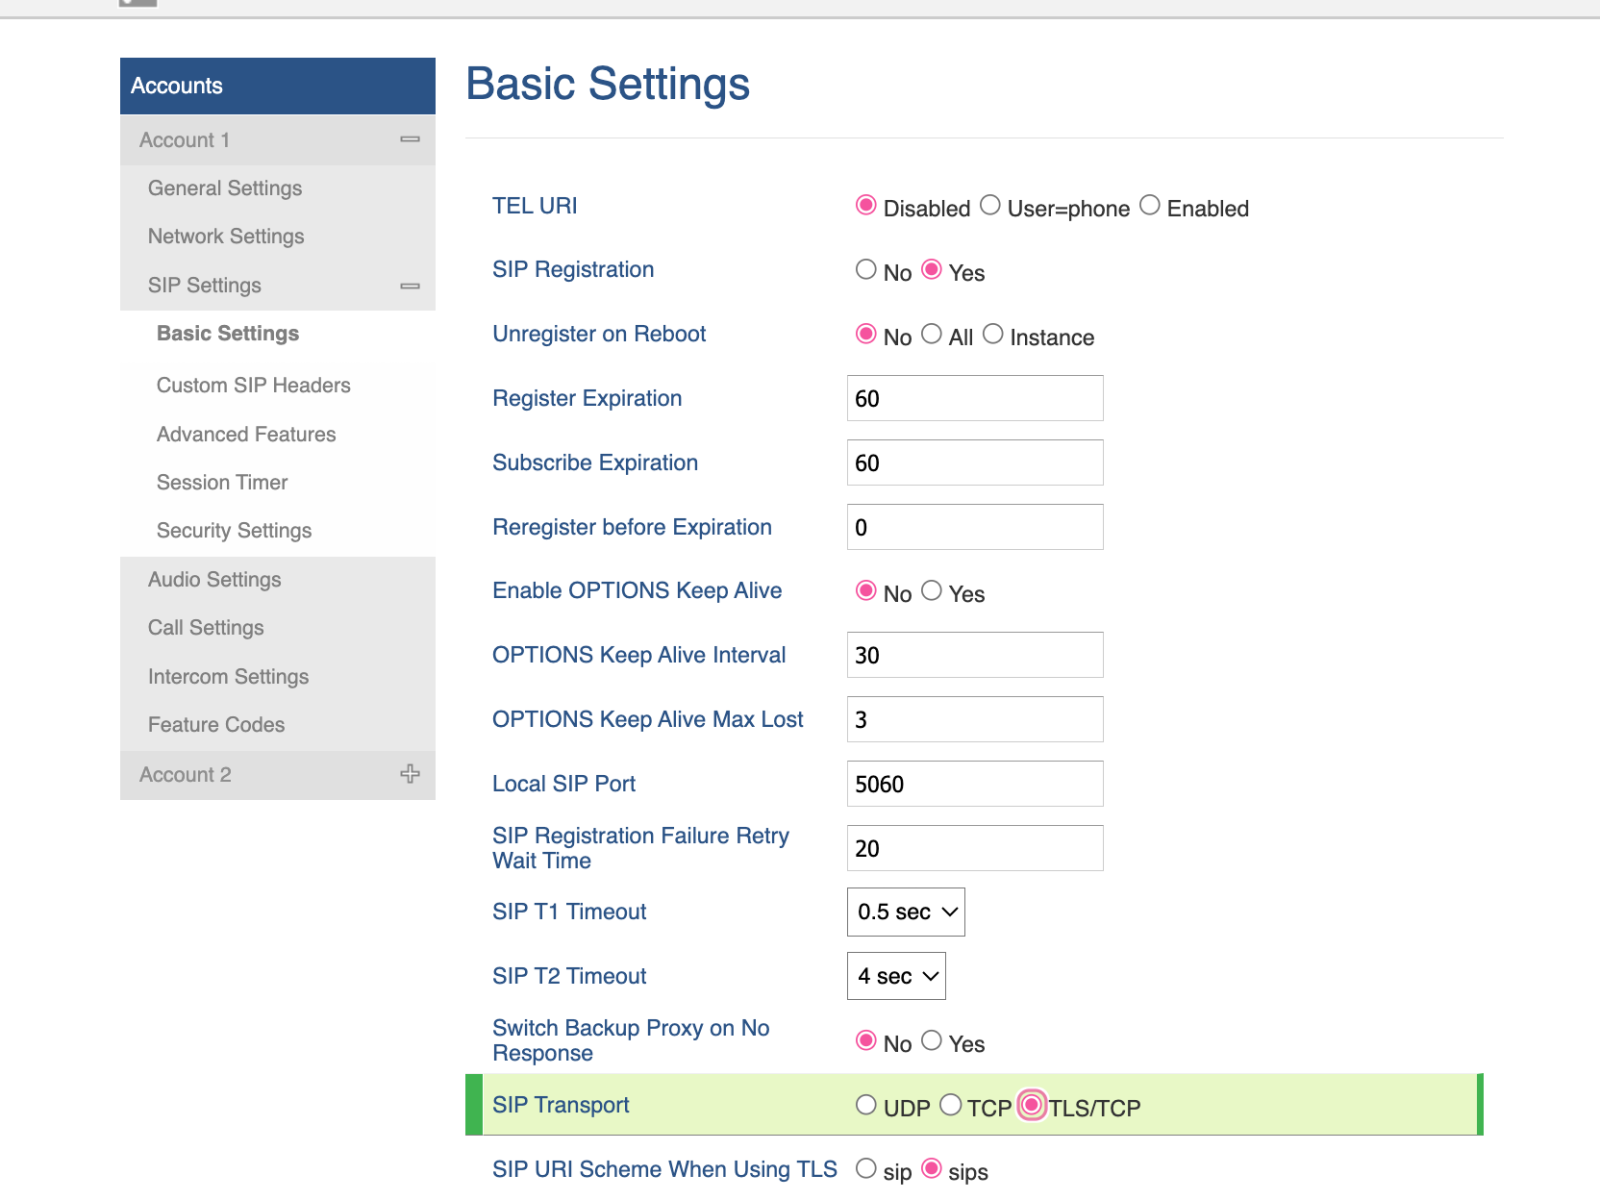
At Account -> Account1 -> SIP Settings -> Basic Settings:
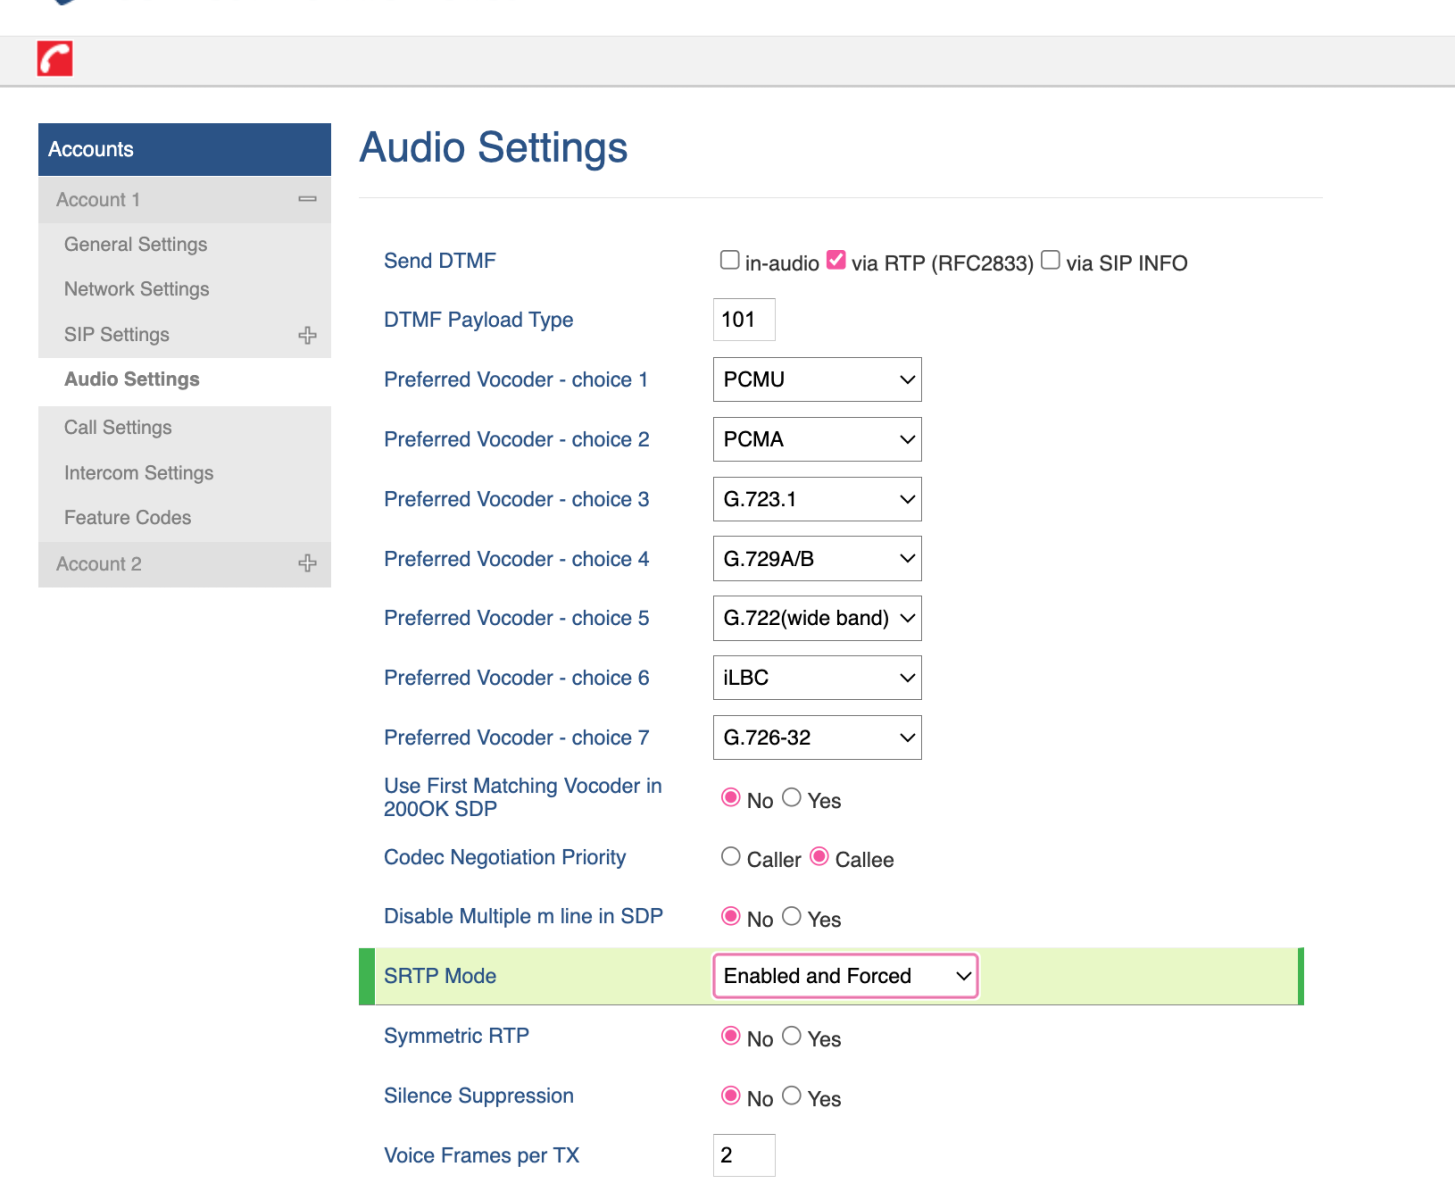
At Account -> Account1 -> Audio Settings
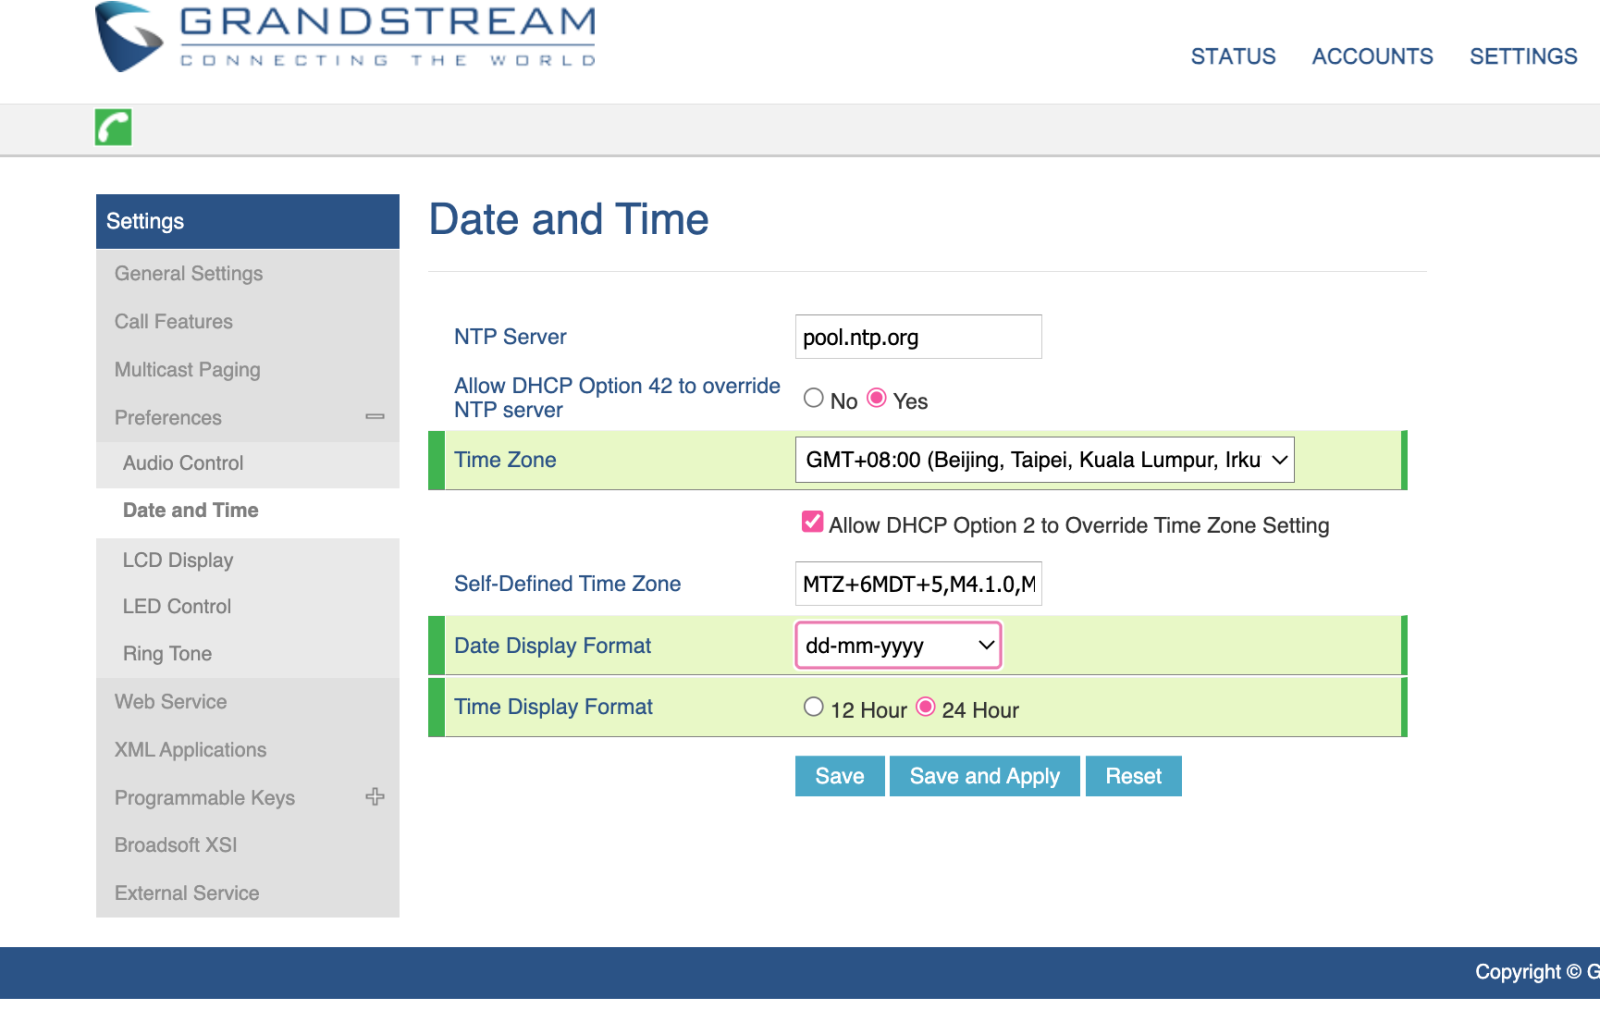
At Settings -> Preferences -> Date and Time
Reboot the -IP-Phone and make a test call (*60 Date and Time Announcement) DONE. Screenshots of the various settings mentioned above.
This article was:
Report an issue
Article ID: 228
Last updated: 18 Oct, 2023
Revision: 1
Views: 79
Comments: 0
|

Powered by KBPublisher (Knowledge base software)