Knowledge For All

WhatsApp With Cloud API

Article ID: 184
Last updated: 12 Mar, 2024

How to configure WhatsApp Cloud 

Prerequisites

Important notes

  • You must have a Business Profile associated to your account and setup MFA with that admin account managing your business profile.
  • Ensure that your Facebook Business Account does not have any restrictions or have issues complying to WA's Business Terms of Service found here and advertising policy here
  • Have experience managing FB's Business Pages, Profile and Developer platform
  • Your account must be able to have full access to all the connected assets, e.g. App, Pages and Profile
  • Your phone number to be setup is available to verify the ownership by means of calls (please do not use SMS, as calls are more reliable)

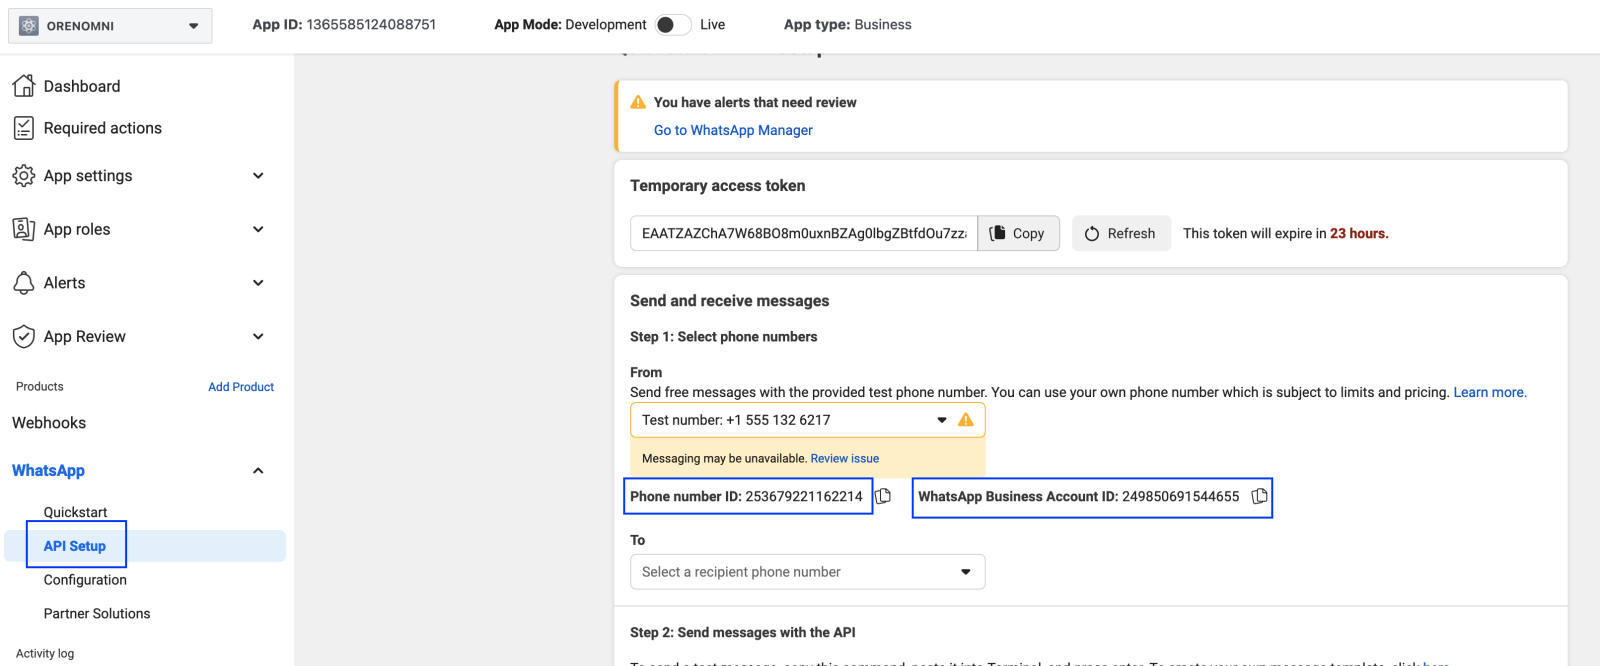
Not complying to the above will not guarantee any success proceeding with this channel.

Create the app in developer account, setup your WhatsApp number and attach it to your Business Manager/Profile.

First, you need to create your Facebook Developer app, search for WhatsApp below and click on Set Up, this automatically enables the WhatsApp Product.

Head on to WhatsApp Cloud API Guide and navigate to section called Set up Developer Assets and Platform Access and follow the steps. You can also refer to this video as a guide.

Once you finish above steps/following video, you can now configure your required phone numbers in the WhatsApp section of your Facebook developer app. If you complete the steps successfully, you should be able to obtain the Phone Number Id and Whatsapp Bussiness Account ID as shown in the below screenshot. OMNI will require these values for creating the WhatsApp Inbox.

Please note "Test WhatsApp Business Account" name is the actual testing account that Meta provides. In your case, this could be the name of the WhatsApp number you just added in the above steps.

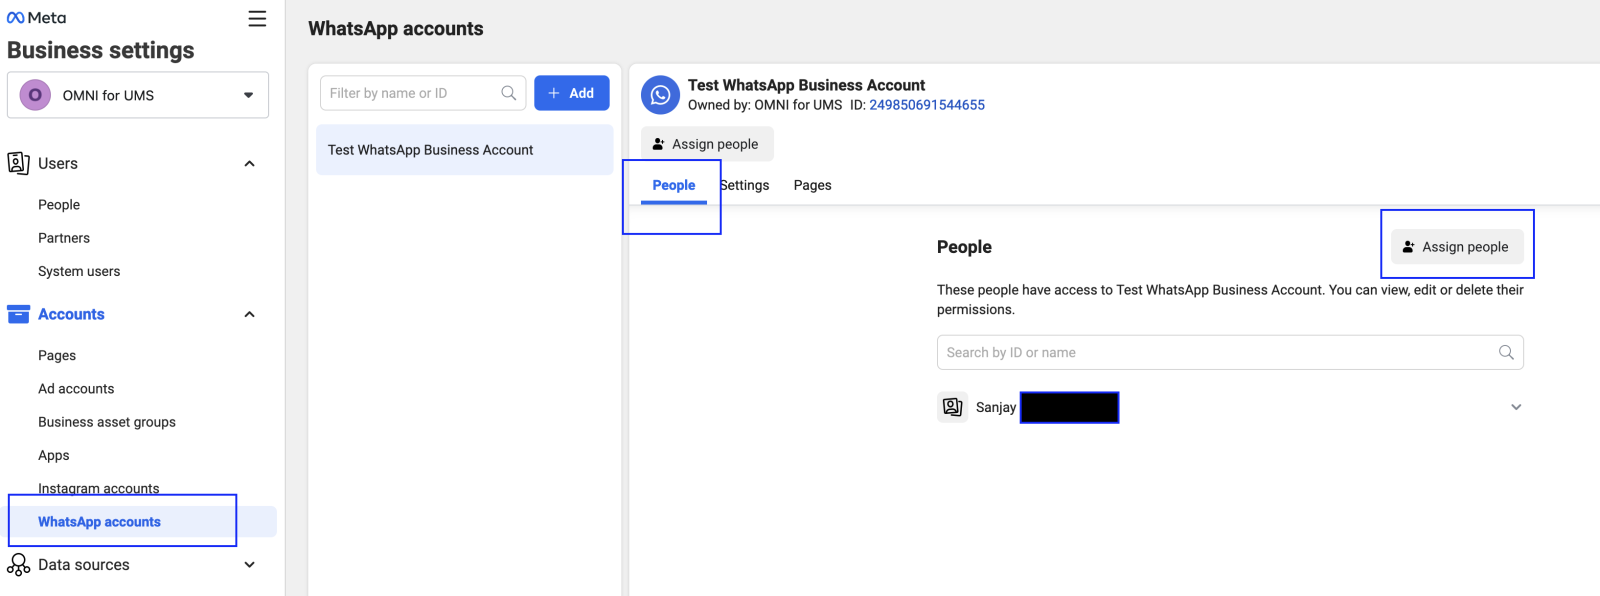
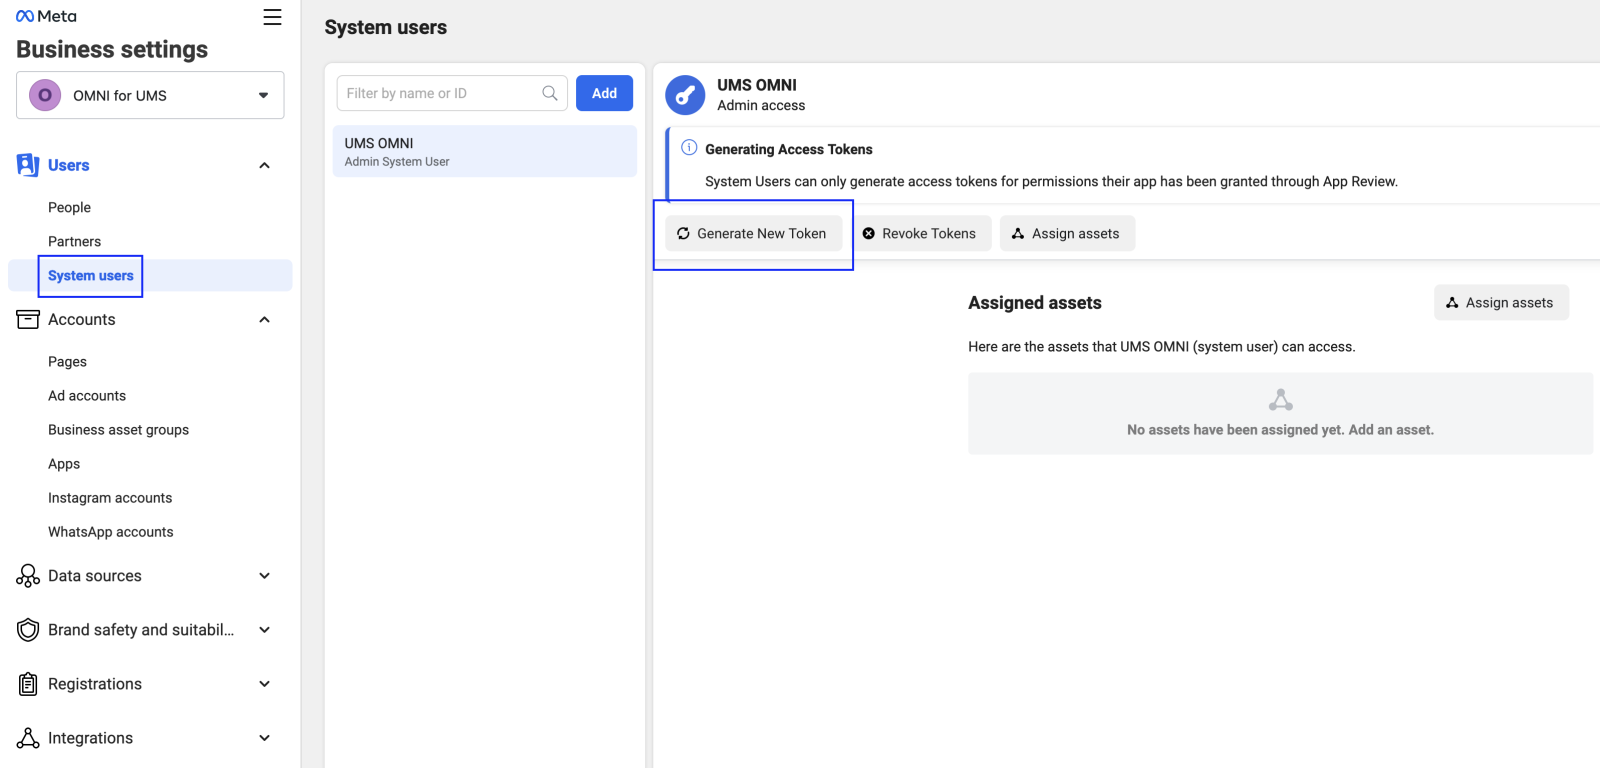
Once above is done, you're now ready to assign your APP you created to your FB Business Profile/Manager and WhatsApp number(s).

Configure a system user for your Facebook Business Profile/Manager

Create a system user in your Business Manager with access to the WhatsApp App. Generate an access token for the user, which will be required as the API key for setting up an inbox in OMNI.

When generating the access token, make sure the manage_businesswhatsapp_business_management, and whatsapp_business_messaging permissions are selected. Altogether there should be three.

Step 1. Create a system user in the System Users tab of Business Manager.

Step 2. Add the system user. Under the WhatsApp Accounts tab, select “Add People” and select the system user to grant access to the WhatsApp Business account. You should also add your newly created APP into here with Full Access. Do the same for all new numbers you've added/created.

Step 3: Generate the access token and request permissions as described above and save it somewhere.
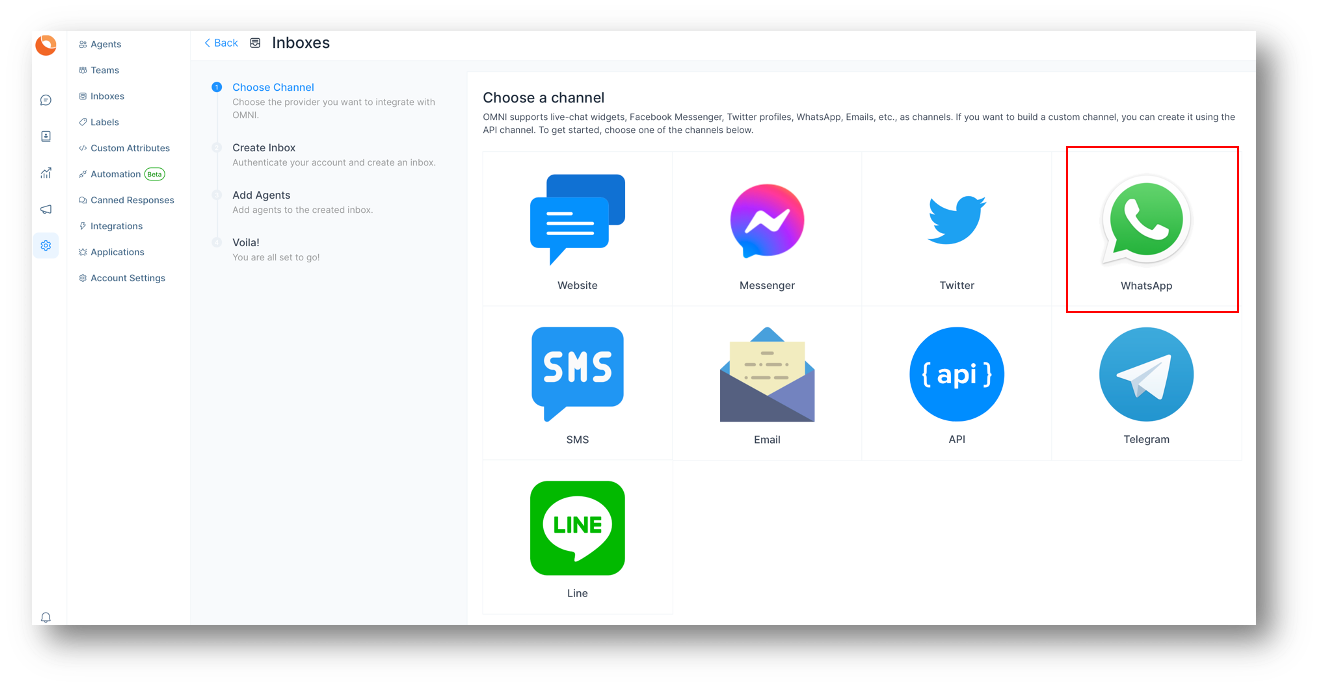
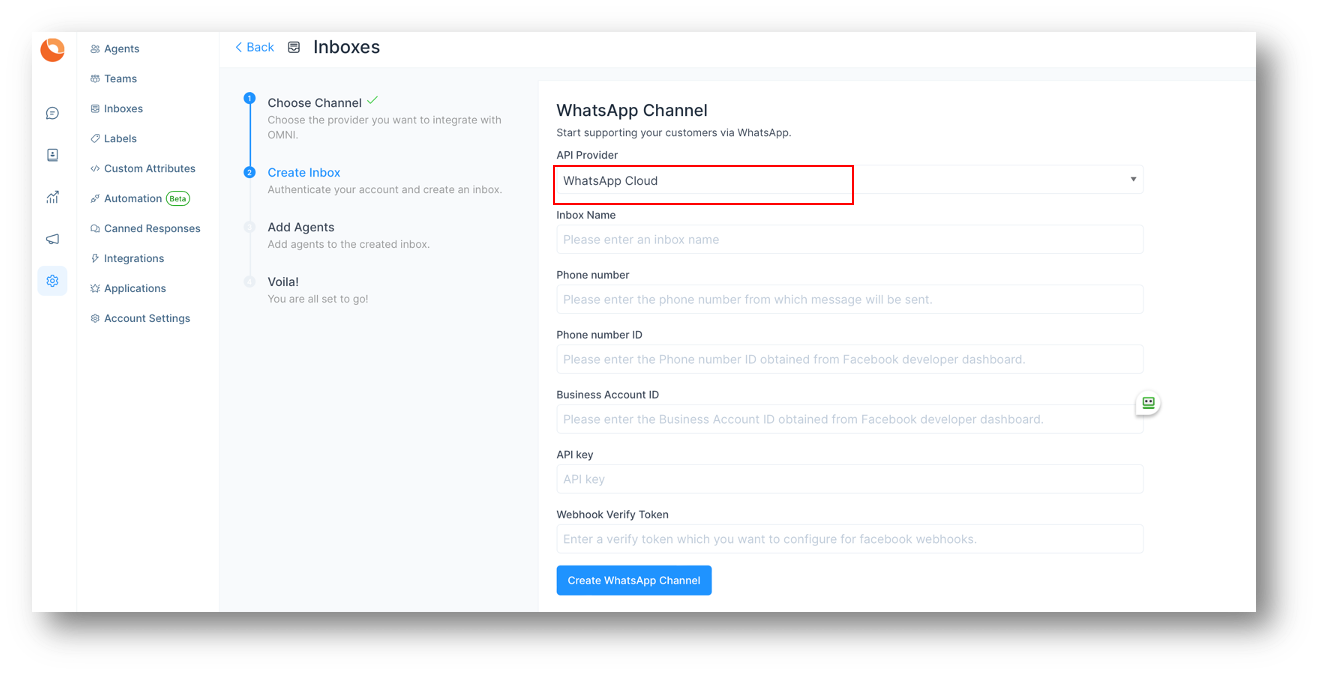
Configuring WhatsApp Inbox in OMNI

Finish the following steps to configure WhatsApp Cloud API Channel in OMNI.

  • Open your OMNI dashboard. Go to Settings > Inboxes > Add Inbox.
  • Choose "WhatsApp" amongst the options of channels.

  • Choose "WhatsApp Cloud" as the API provider. Fill in the appropriate details

Values Description
Name Choose a name for your Inbox. Ex: Your Business Name
Phone Number Fill in the phone number you have configured in Facebook Developer App
Phone Number ID The phone number ID for the number as obtained in prerequisites
Business Account ID The Business Account ID for the number as obtained in prerequisites
API Key The Business Account User's access token for the number as obtained in prerequisites
Webhook Verify Token This token is required while configuring Webhook in Facebook Developer App. Fill in a secure alphanumeric string that you wish

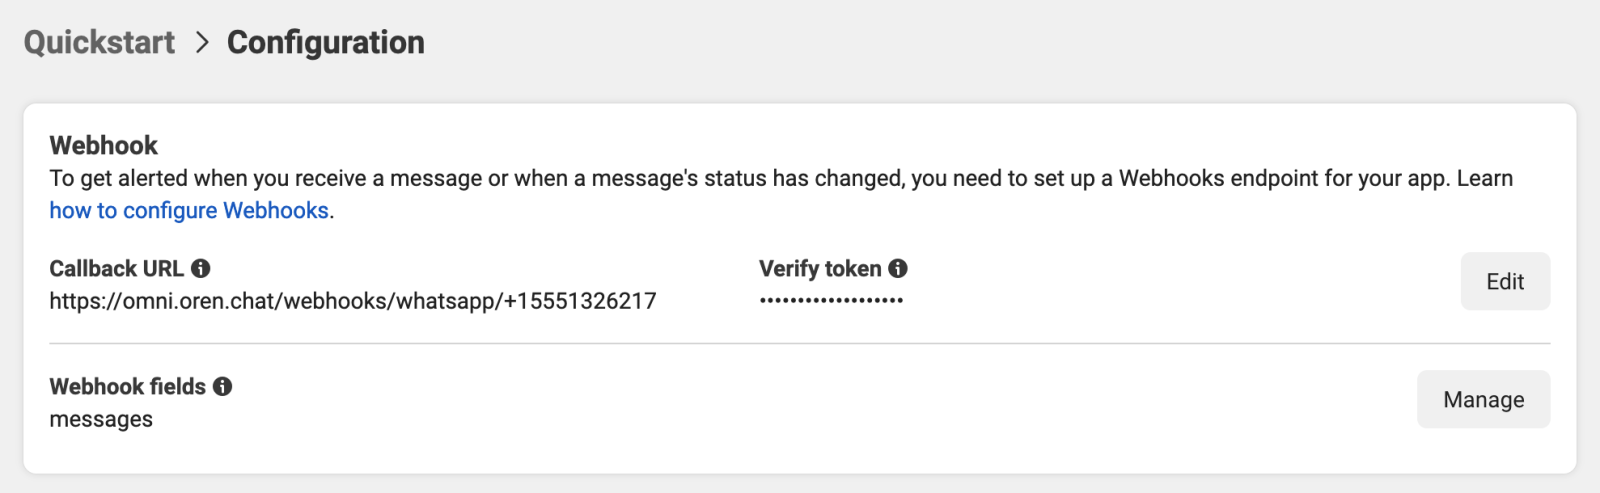
Finish the steps to obtain your WhatsApp Webhook Callback URL and token. This will be used below in final steps.

Final Steps

Configure Webhook in Facebook Developer App

Head back to the WhatsApp section in Facebook Developer App. Navigate to the Configuration subsection and set up the Callback URL

  • The value for the url should be the same URL you obtained at the end of your OMNI inbox creation and will look like https://omni.oren.chat/webhooks/whatsapp/+NNNNNNNNN. (It will appear when you complete above steps)
  • The value for the verify token should be the same value you configured for the Webhook Verify Token during inbox creation

You should also subscribe to messages fields events under Webhooks Fields on your Facebook Developer app. Once you finish all the steps, the section should look like the below screenshot.

FAQ

How to configure more numbers under a single Facebook app?

By default Meta allows up to 2 numbers per Business Profile, however, Meta App allows configuring only a single Webhook endpoint. So create Inboxes in OMNI for all the numbers as required. Just use ONE of these webhooks for both numbers.

This article was:  
Report an issue
Article ID: 184
Last updated: 12 Mar, 2024
Revision: 23
Views: 61


This website uses cookies to ensure you get the best experience on our website. Learn More