|
Article ID: 160
Last updated: 17 Sep, 2022
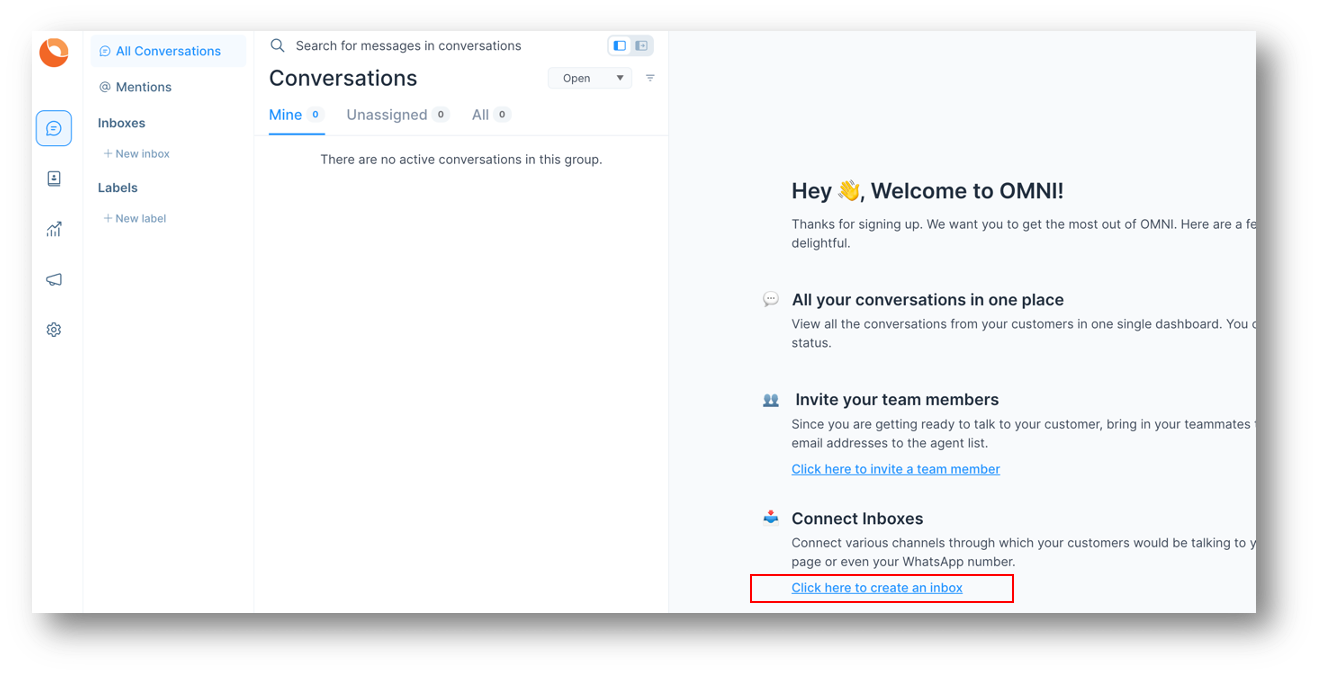
Add InboxAn Inbox shows the connection of a website or a Facebook page to OMNI. You can have limits to add inboxes in your OMNI account based on your subscription. Inbox can be added to your account in any of the 3 ways as below. One way is to click on 'Click here to create an inbox' like in the picture given below.
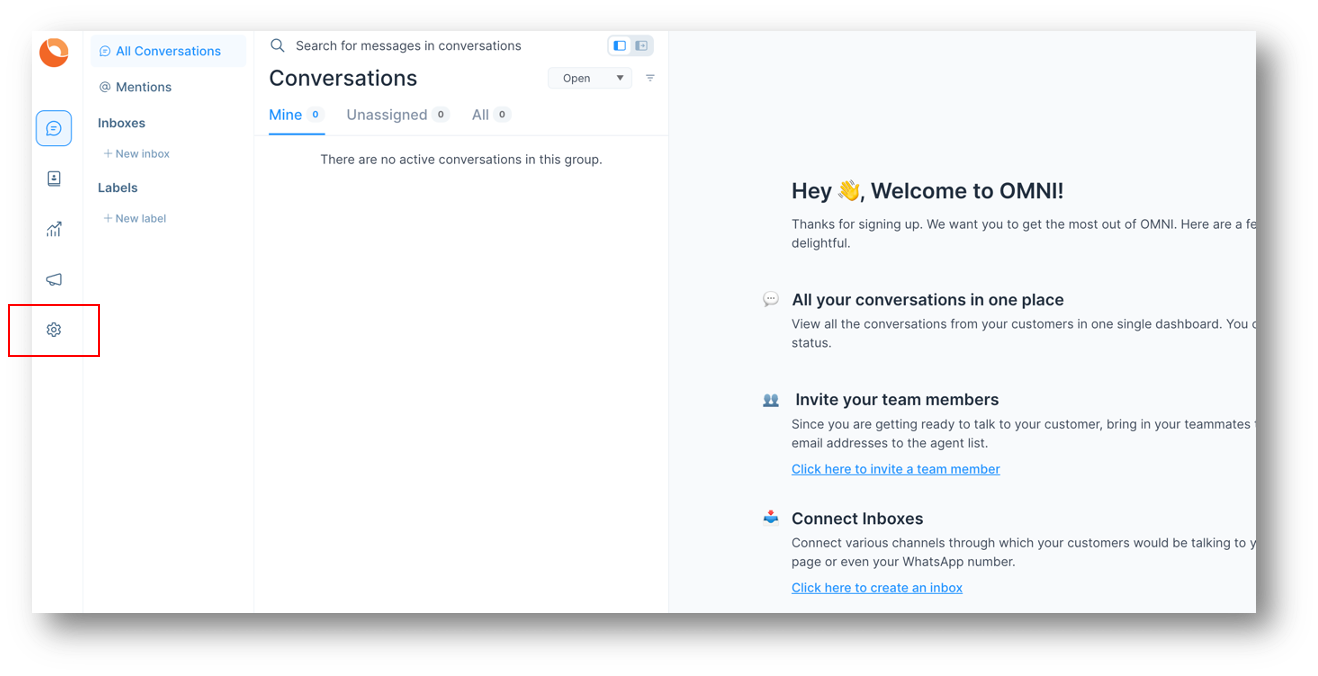
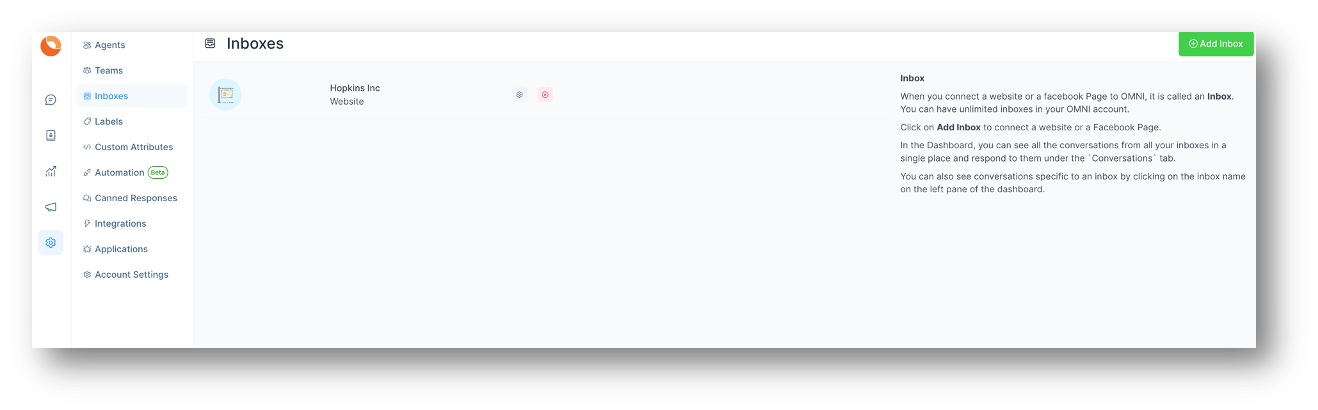
Second way to create Inbox is to click on Settings on OMNI Dashboard home page and then to Click on Inboxes.
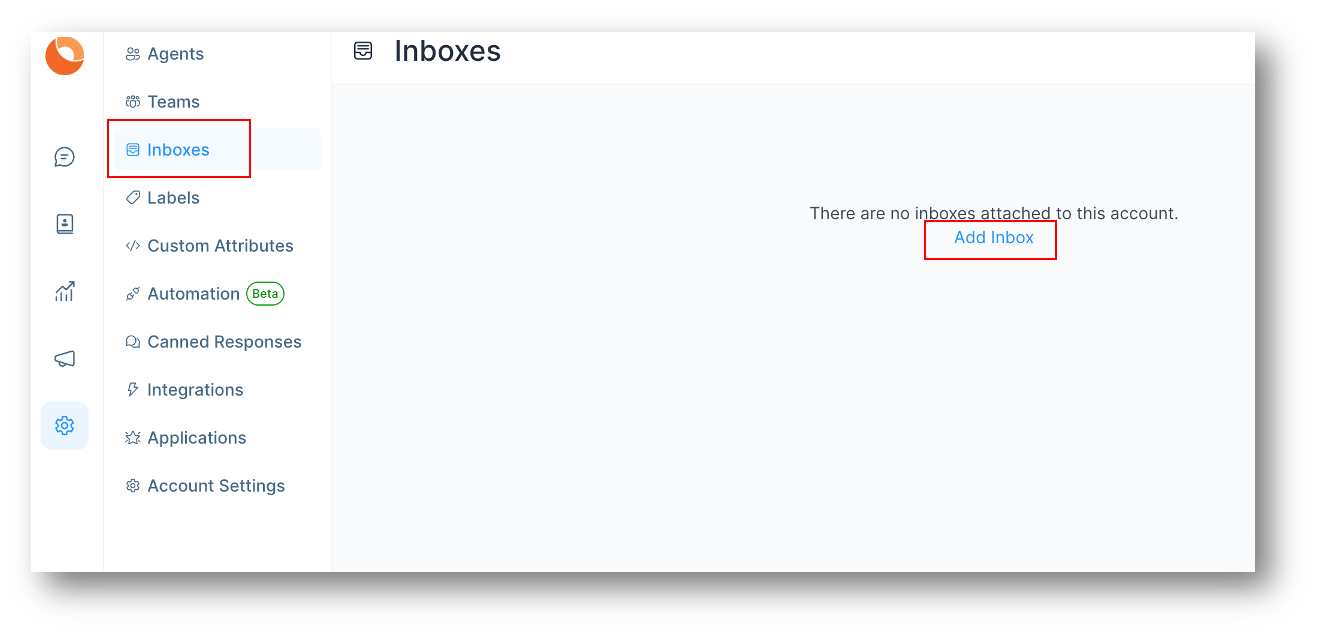
Click on Inboxes to reach the Inbox screen. Here you can add Inboxes and once added can be viewed here.
Third way to create Inbox is to click on the '+' button near the Inboxes link on Chatwoot Home Screen itself.
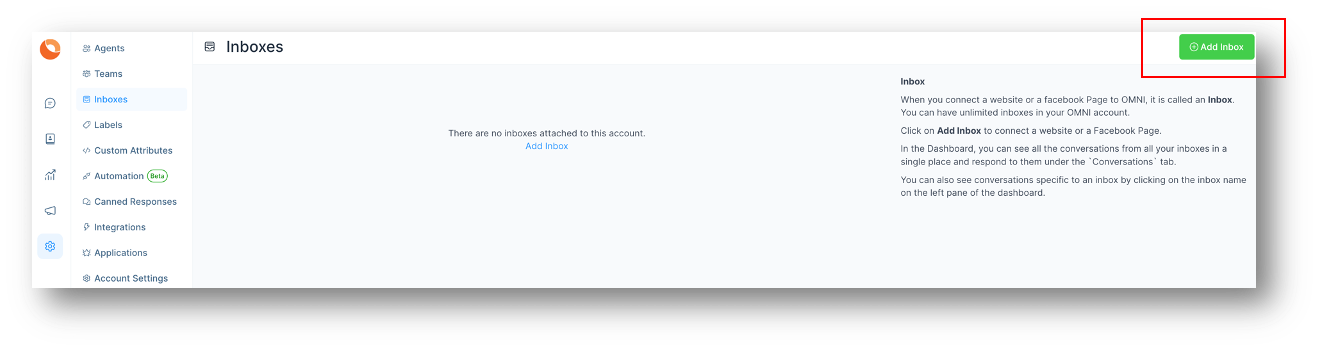
Then, click on Add Inbox Button on Top Right Hand Corner of the page.
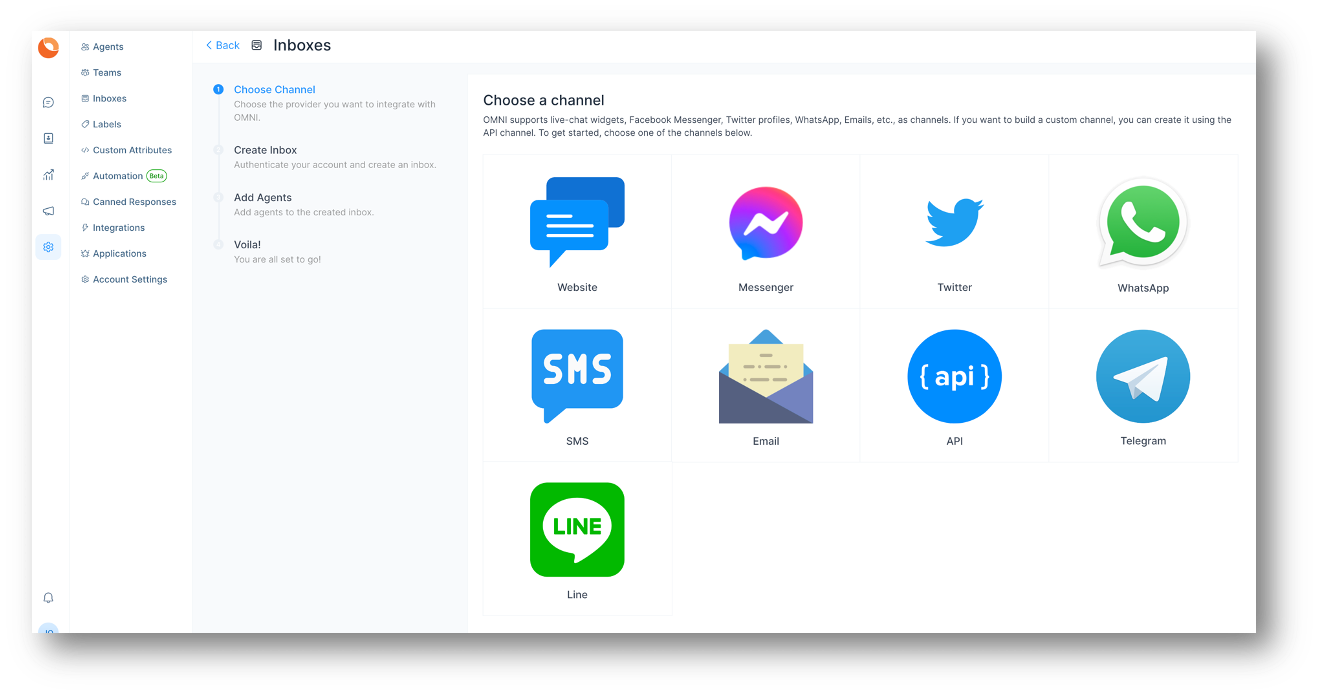
A screen as given below opens, where Inbox can be added for various Channels. Eg: Website, Facebook, Twitter, WhatsApp, SMS, Email, API, Telegram, and Line. Inboxes would be connected to the front end Widgets placed in Website or other channels. For more information on each Inboxes, please see "Inboxes" guide one level above this guide.
Inbox for a WebsiteHere is an example of how to add an Inbox for a Website. Click on Website Button.
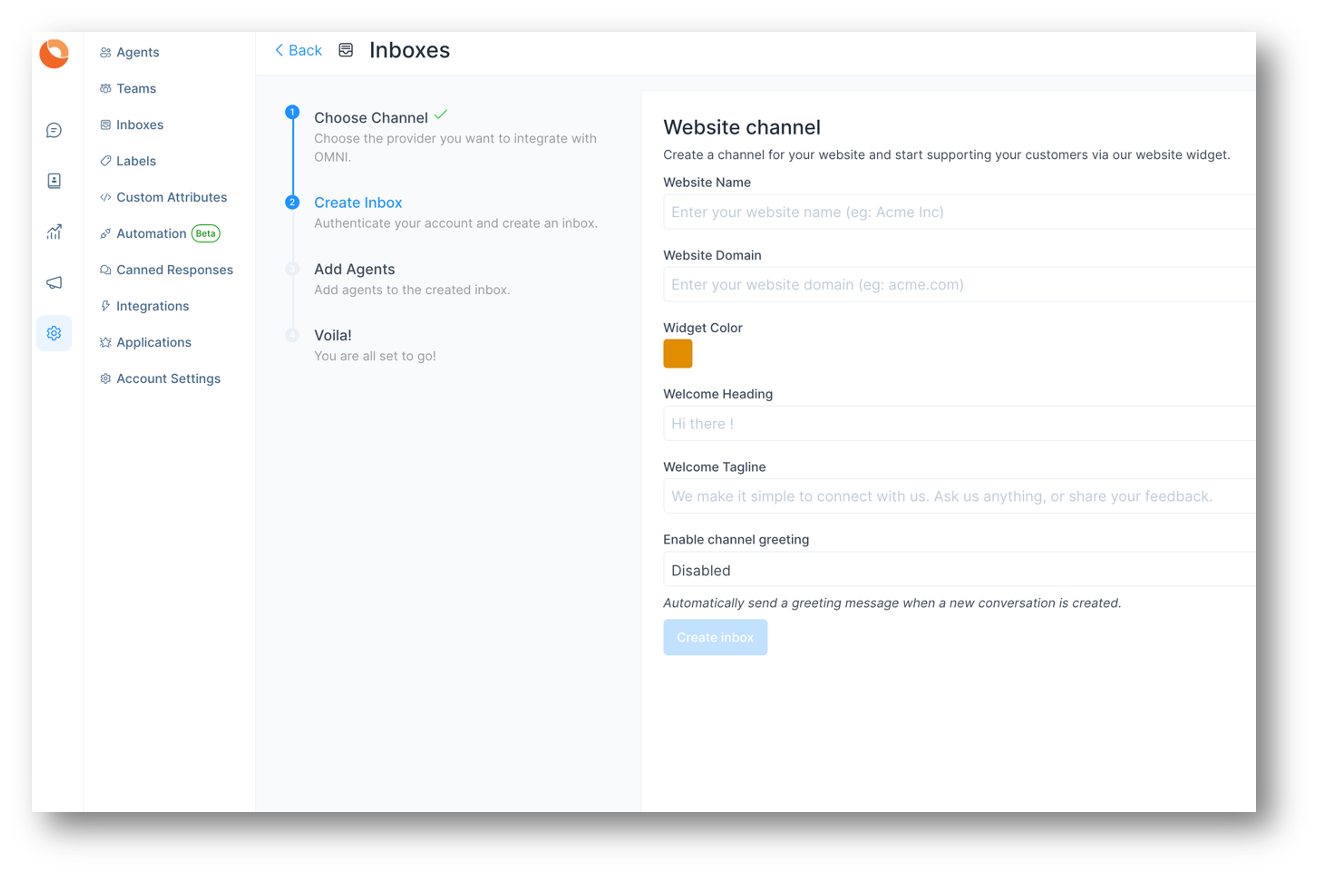
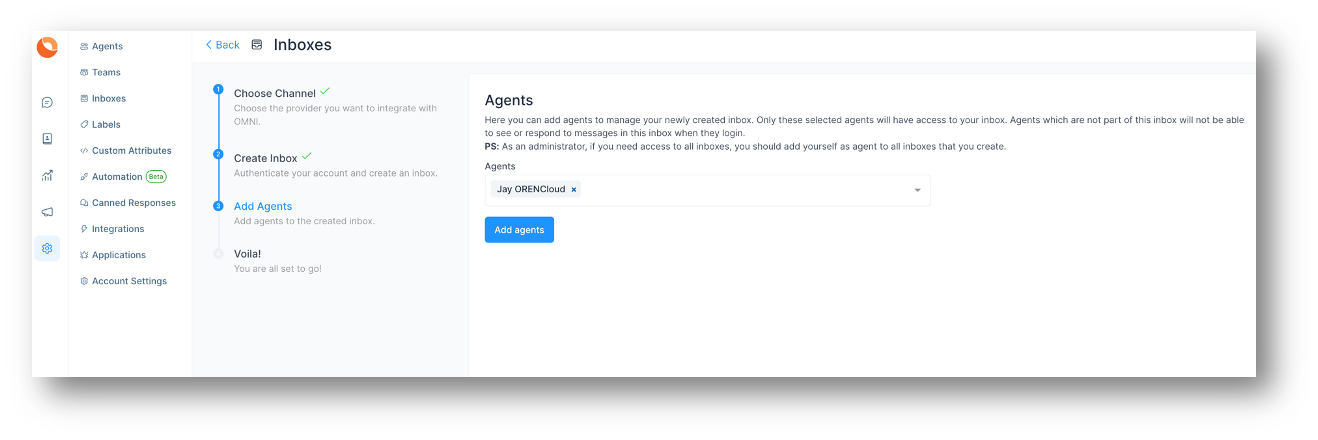
Once all details are entered, click on Create Inbox Button. The Next session will open up to Assign Agents to the Inbox. Only if an Agent is associated with the Inbox, the conversations will be directed to the agent. Even if you are an Administrator, you need to add your name as agent to the Inbox to see the Inbox on your screen. Select the Agents from the drop-down(if agents have not been added go to Add Agent) and click on Add agents.
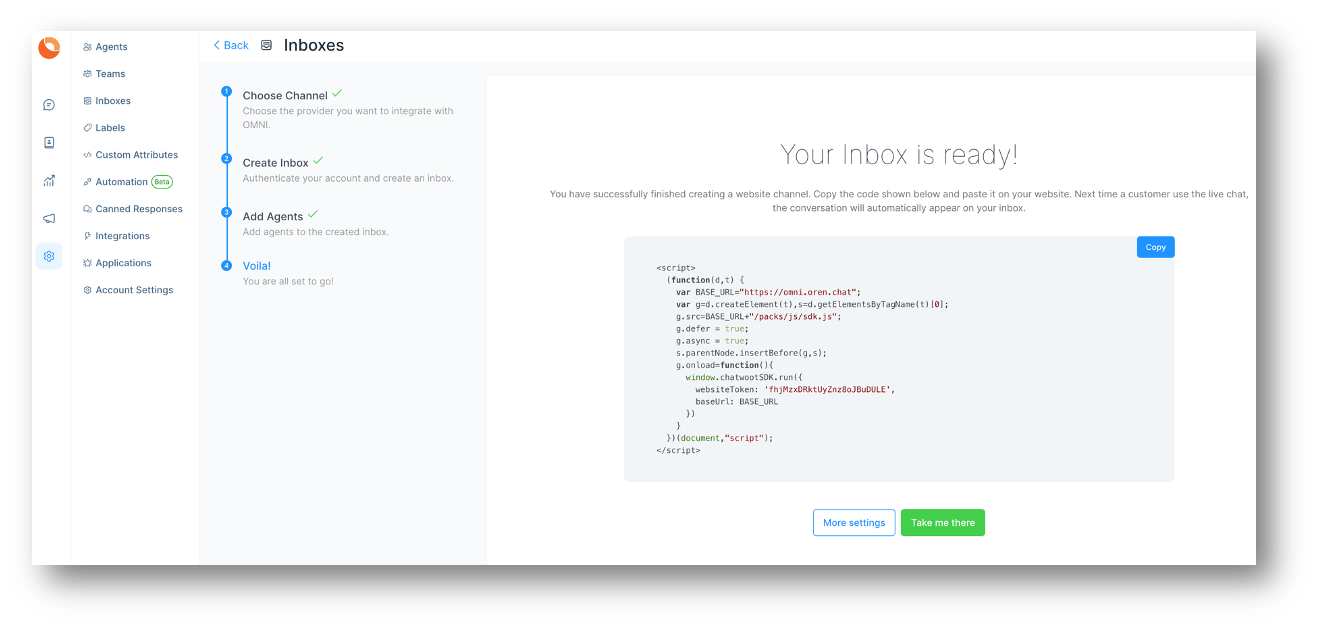
The below screen will open. This screen has the code snippet which can be directly used to install the widget. You can click on Copy button to copy and then paste in the root code of your website. Ask our team if you need help with this. Usually it will require someone with knowledge on website development.
If you click on 'More settings' Button, you will be taken to Additional Settings for Inbox. If you click on 'Take me there' button you will be taken to the newly created Inbox directly. Now if you click on Inboxes link on the home screen, you can see that the new Inbox has been created for use.
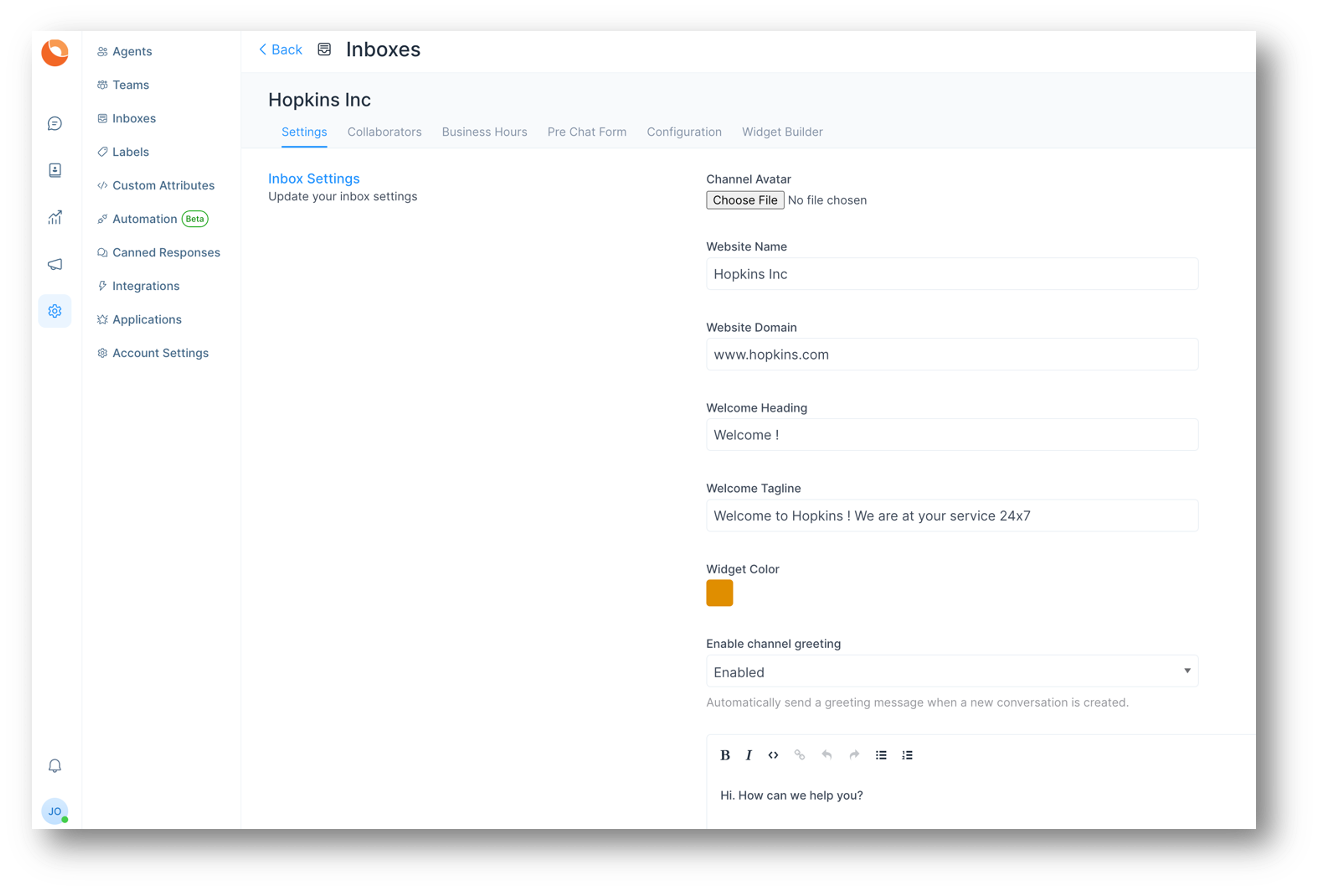
Additional Inbox SettingsClick on Settings. Below Session will open up.
Do a scroll down to reach the below screen where you can set up the various notifications you would like to receive when your inbox starts functioning.
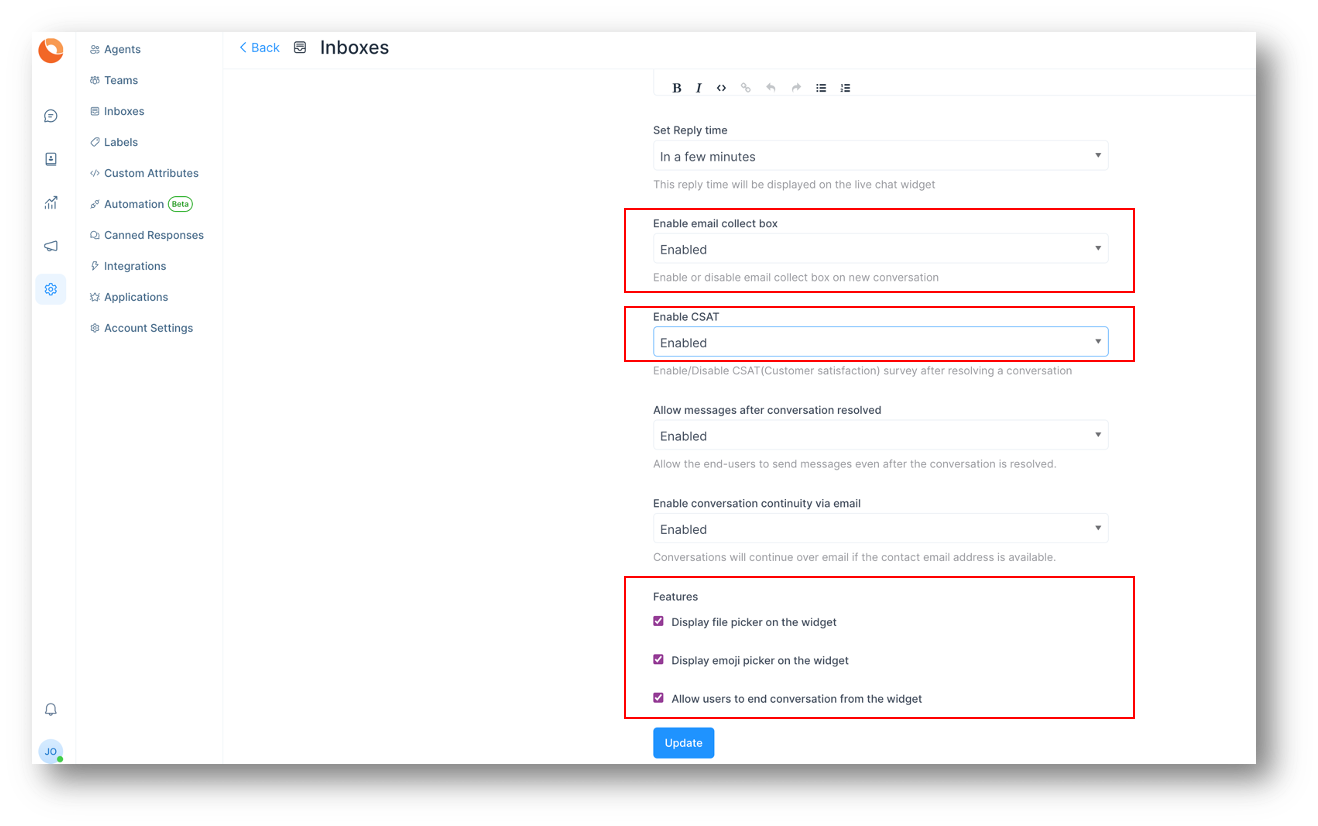
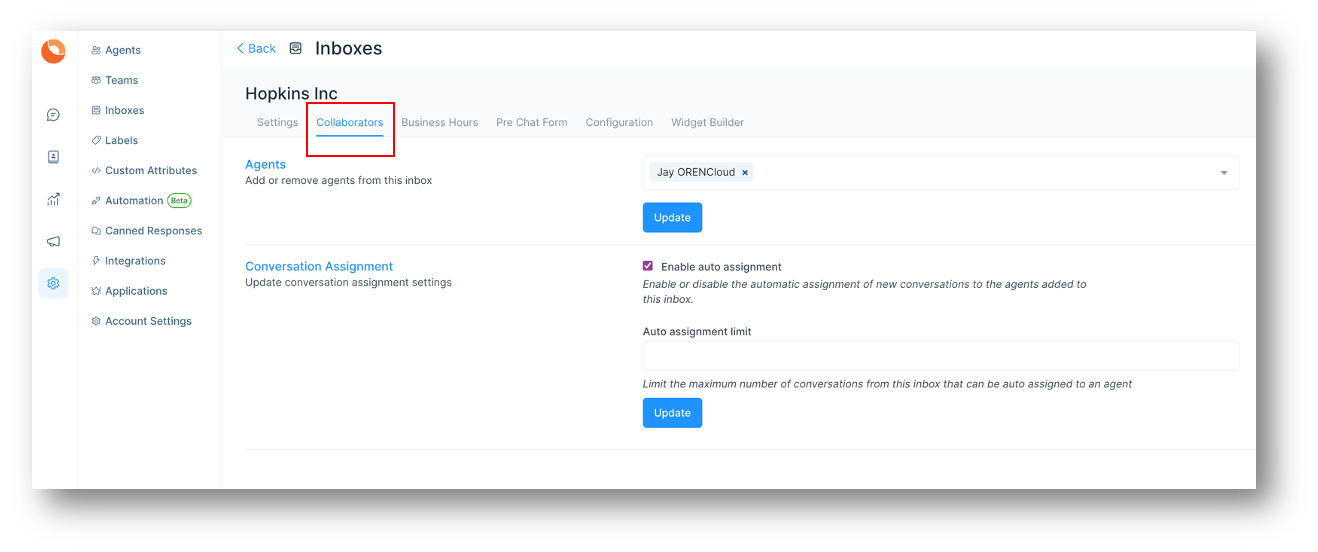
Here, Enable email collect box is Enabled by default. This means an automatic message to collect the e-mail id will be displayed once the customer starts a conversation. Customer/End user will receive a prompt to enter e-mail id. Also, there is an option to Enable CSAT. Once you enable this Customer Satisfaction survey will be launched on Resolving each ticket. The CSAT results can be viewed later in Reports section. Click on 'Update' button to save the changes you have made. CollaboratorsClick on Collaborators. You can add Agents to the Inbox or delete Agents who have been already added in the Inbox in this section.
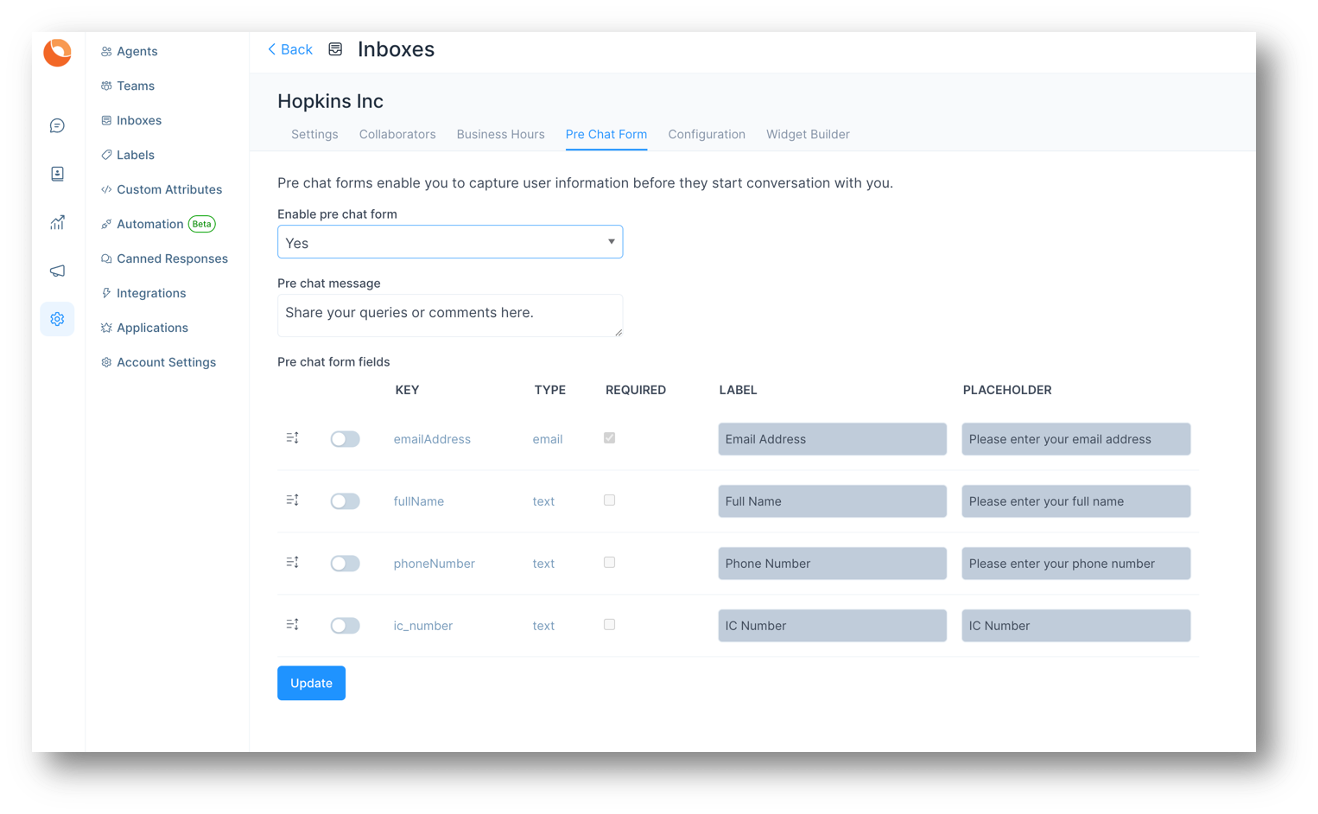
Click on Update to save the changes. Pre Chat FormIn the Inbox Settings, click on the tab Pre Chat Form. This is an option to display message to the Customer when the customer clicks on the widget. We can use this to collect name and e-mail address before beginning the chat.
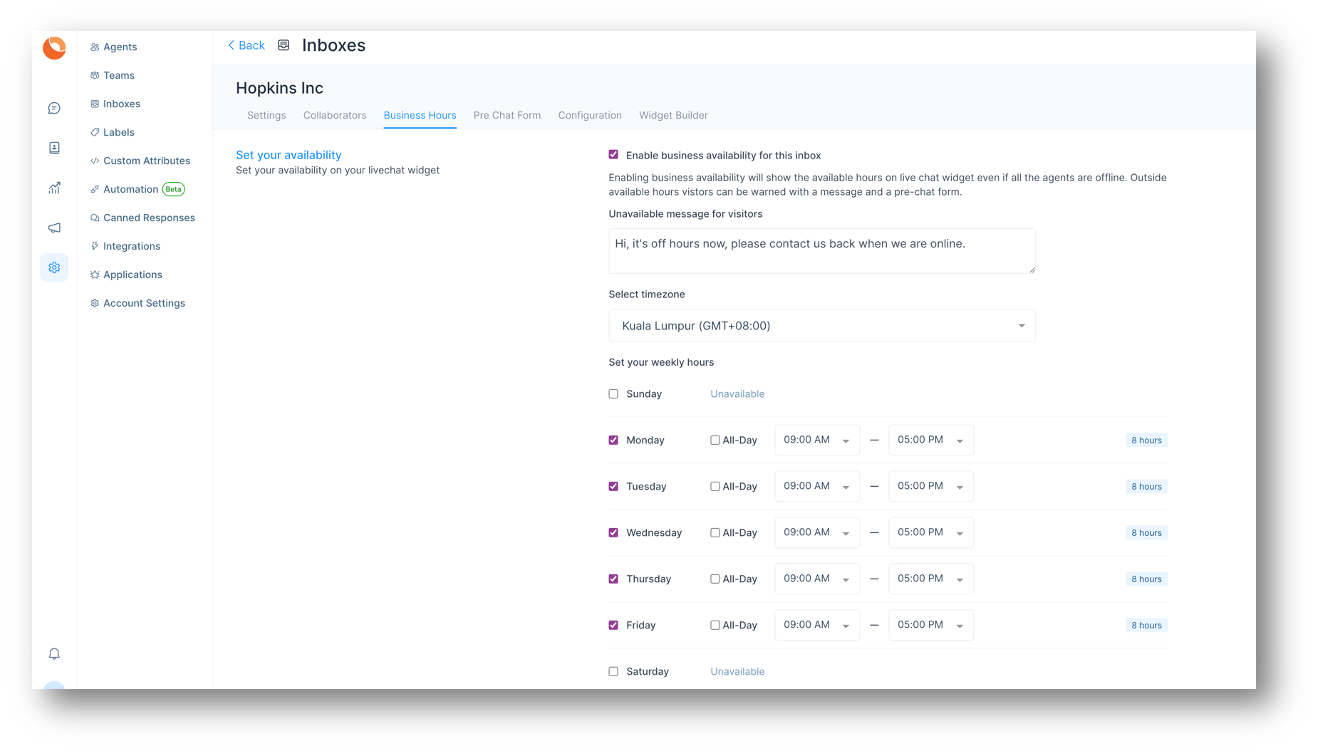
If you want to add additional fields, you must add new Custom Attributes. Please see the Custom Attributes topic one level above this article. Then, once you've add a contact custom attribute, it can be selected here as seen above, the IC number field. Click on update. Pre Chat Form is enabled now. Business HoursClick on Business Hours Tab. In this section, you can set working hours of your firm, or working hours when your agents are available online. Click on the check box for 'Enable business availability for this inbox' if you have a defined business hours. Once the check box is ticked, the below section opens up where you can give your message to the customer during OFF business hours. You can also select the available business hours for each day of the week, along with proper time zone.
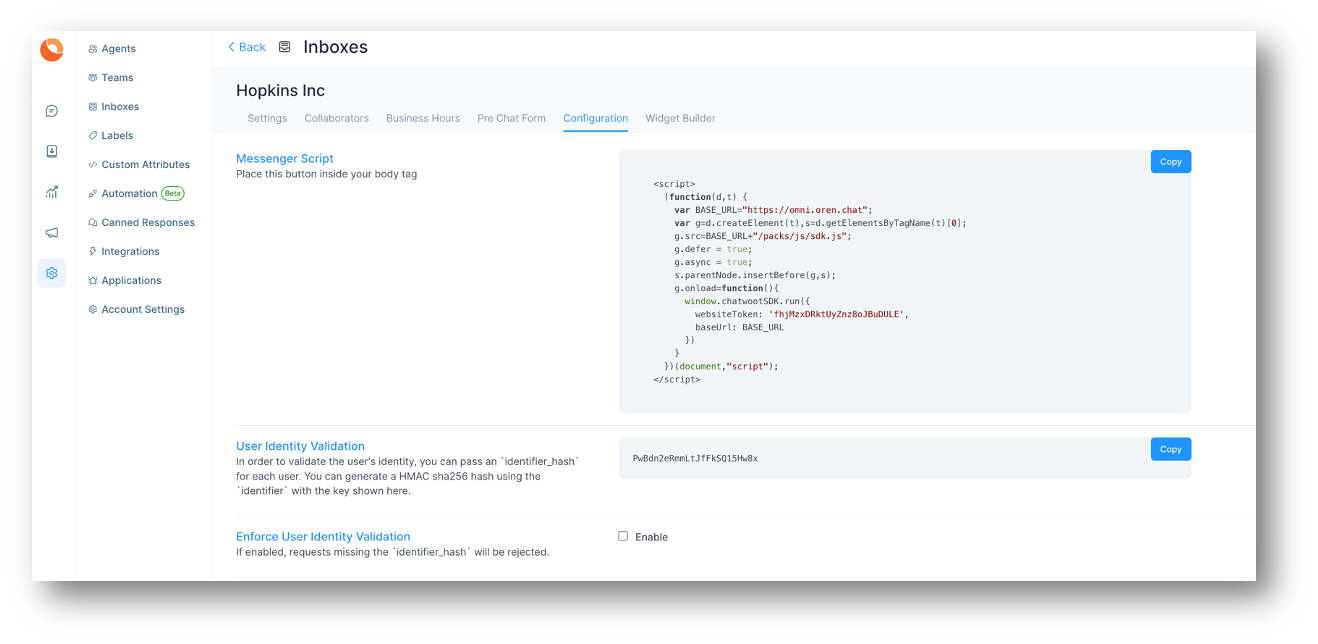
Click on Update Business Hour Setting Button. ConfigurationClick on Configuration. The code snippet to be copied to the website will appear here.
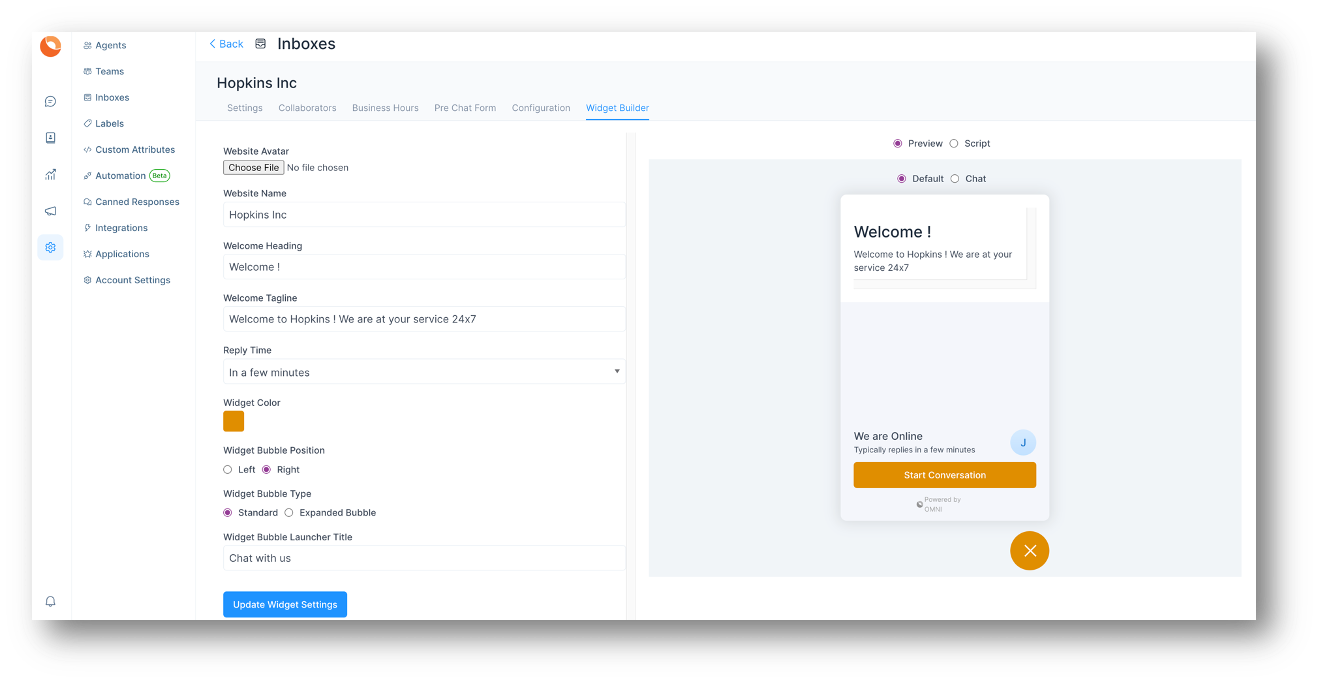
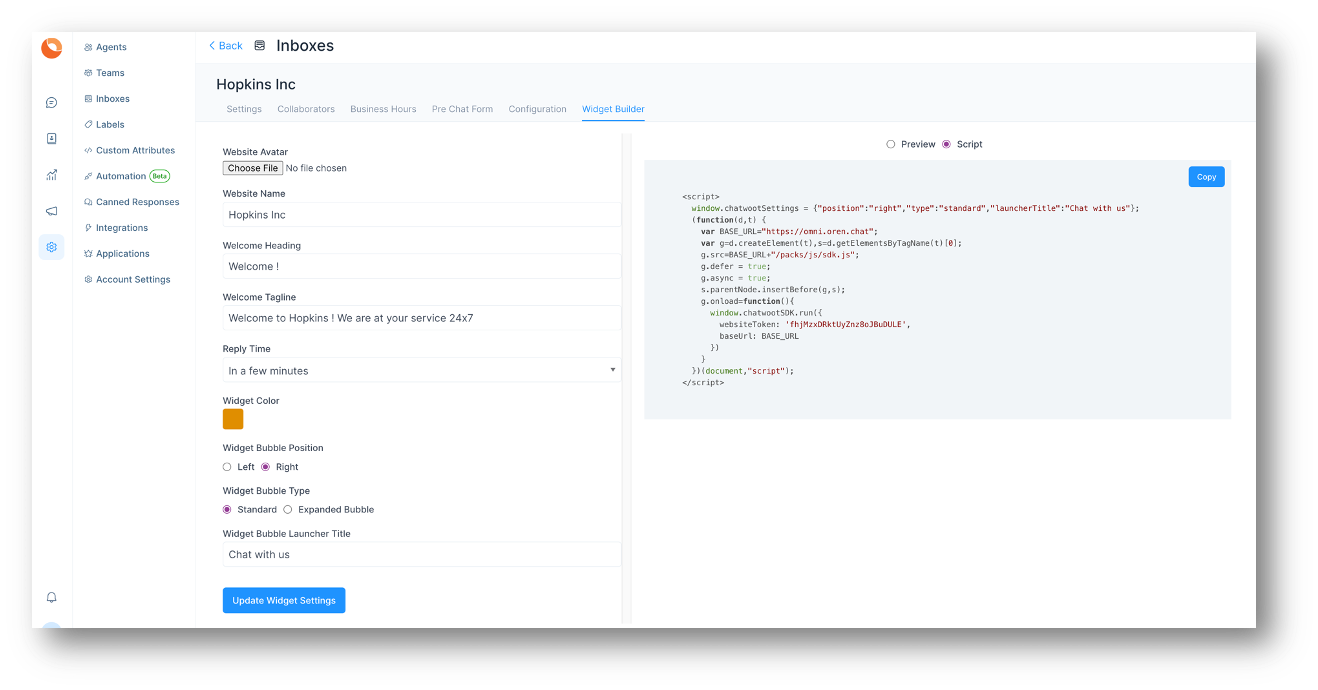
You can click on 'Copy' button to copy the code and paste in the root code of your website. Widget BuilderWidget Builder allows you to further customise the look and feel of your website inbox chat prompt/bubble.
Explore options and see preview on the right side of the changes you've made. Once you've done with the customisation, be sure to copy the new script under the option selector "Script"
Instead of copying the script from "Configuration" tab, use this instead if you have made customisation using the Widget Builder tool.
This article was:
Report an issue
Article ID: 160
Last updated: 17 Sep, 2022
Revision: 9
Views: 64
|


Powered by KBPublisher (Knowledge base software)